Tutorial: Migration from Silverlight application to OpenSilver
In this tutorial we are going to migrate an example of Silverlight application to OpenSilver. The C#.NET source code can be found here.
It is assumed that the steps described in the Environment Setup page have already been done.
The migration steps described below will help us avoid duplicating source files and let us share them between separate .sln and .csproj or .vbproj files.
The general idea is to create a separate OpenSilver project with the same name and directory structure as the Silverlight's, then rename the solution and the project names. After that, we can simply copy the files in the actual Silverlight project's location and use them without manual modifications.
About the Silverlight application
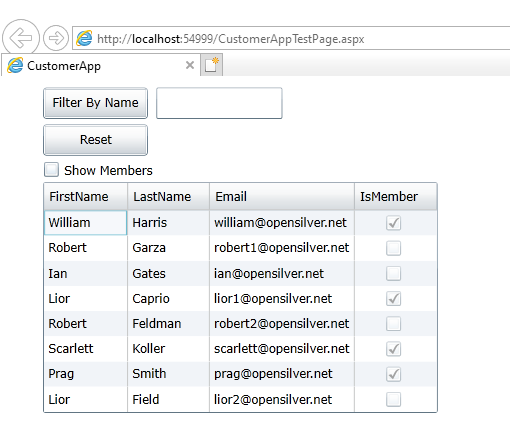
CustomerApp is a simple Silverlight application which shows basic customer information in a Data Grid View and allows to filter the information by customer name or by membership.
Here is how it looks like.
The directory structure of the Silverlight application looks like this.

It is a simple Silverlight application with a reference to an additional Silverlight Class Library (CustomerData)
Migration Steps for the C#.NET Silverlight App
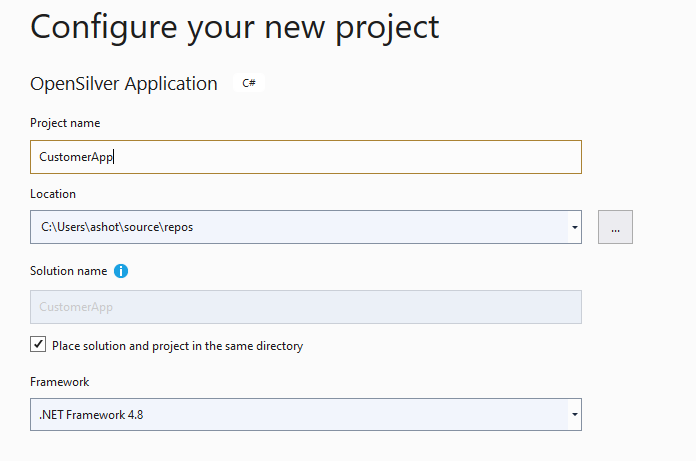
1. Create a new OpenSilver project (Visual Studio 2022)
In this step we are going to create a separate OpenSilver project with the same name as the Silverlight application's, but in a different location.
- Go to
File -> New -> Project, then chooseOpenSilver Application.

- Type CustomerApp as a
Project name - Check
Place solution and project in the same directoryand clickCreate
2. Add a new OpenSilver Class Library
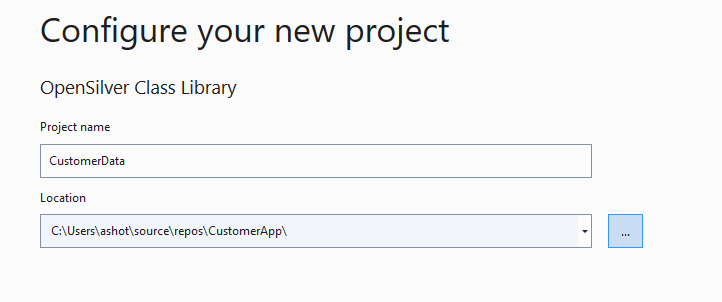
We need to recreate the original project's structure in our new OpenSilver project. Since the original has a Silverlight Class Library, we need to create a new OpenSilver Class Library with the same name.
- In
Solution Explorer, right-click onSolution -> Add -> New project... - Choose
OpenSilver Class Libraryand clickNext - Make sure the end location is CustomerApp
- Type CustomerData as
Project nameand clickCreate
3. Add CustomerData as a Project Reference
- In
Solution Explorer, right-click on the Dependencies of CustomerApp project-> Add Project Reference... - Choose
CustomerDataas a reference project and clickOK

4. Rename the OpenSilver projects
We cannot copy the files as they are, because they would overwrite the original Silverlight ones. We therefore need to rename them. To do so, we will rename the projects in Visual Studio:
- Rename
CustomerApptoCustomerApp.OpenSilver - Rename
CustomerDatatoCustomerData.OpenSilver - Rename
CustomerAppSolution toCustomerApp.OpenSilver

Now we can close Visual Studio 2022.
5. Copy files and directories from the OpenSilver project to the Silverlight project
- Copy the CustomerApp.Browser, CustomerApp.Simulator folders and the CustomerApp.OpenSilver.sln file to Silverlight's root directory
- Copy the CustomerData.OpenSilver.csproj and CustomerApp.OpenSilver.csproj files to Silverlight's corresponding projects directories

6. Compile the migrated project with Visual Studio 2022
- Open CustomerApp.OpenSilver.sln located in the Silverlight's project with Visual Studio 2022
- For C# code, in
Solution ExplorerfindAssemblyInfo.csfor both projetcs CustomerApp and CustomerData, and exclude it as shown below.

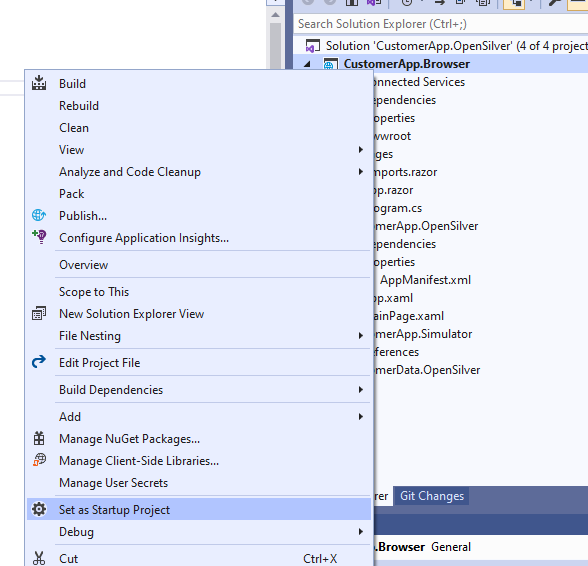
- Make CustomerApp.Browser the Startup Project.
- Rebuild the solution and run it
The result should look like this

And if we check the 'Show Members' checkbox we will see the filtered result
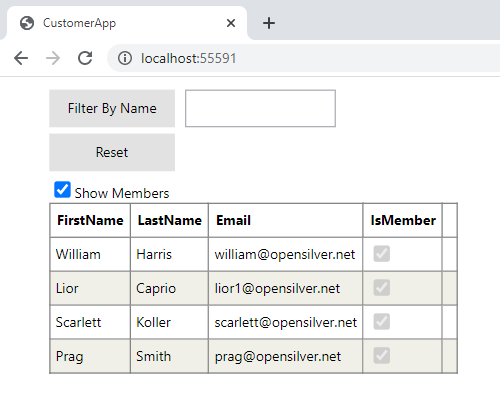
Please note that in the example we didn't change a single line of Silverlight's code and we didn't fix any compilation errors. In real and much bigger projects however some errors are expected to happen.
Migration Steps for VB.NET Silverlight App
This follows the same steps as C#.NET Silverlight App Migration. Please refer to the corresponding section for detailed instructions.
1. Create a new OpenSilver project (Visual Studio 2022)
2. Add a new OpenSilver Class Library
3. Add CustomerData as a Project Reference
4. Rename the OpenSilver projects
5. Copy files and directories from the OpenSilver project to the Silverlight project
- Copy CustomerApp.Browser, CustomerApp.Simulator folders and CustomerApp.OpenSilver.sln file to Silverlight's root directory
- Copy CustomerData.OpenSilver.vbproj and CustomerApp.OpenSilver.vbproj files to Silverlight's according projects directory
6. Compile migrated project with Visual Studio 2022
- Open CustomerApp.OpenSilver.sln located in Silverlight's project with Visual Studio 2022
- For C# code, in the
Solution Explorerfind theAssemblyInfo.vbfile for both projects CustomerApp and CustomerData, and exclude it - Make CustomerApp.Browser the Startup Project
- Rebuild the solution and run it
